 |
 |
 |
 |
This function allows you to create the checkout container permit in the SAUDI EDI application.
To create container permit
1. Open the Create page. (SAUDI EDI>> Checkout Container Permit>> Create)
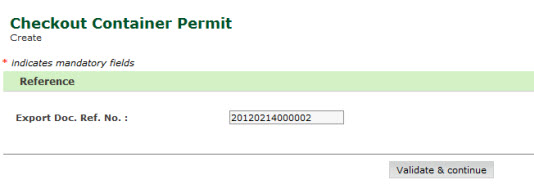
Checkout Container Permit Create Page
2. Enter the Export Doc Ref No and click Validate and Continue button. The Create screen will be displayed.
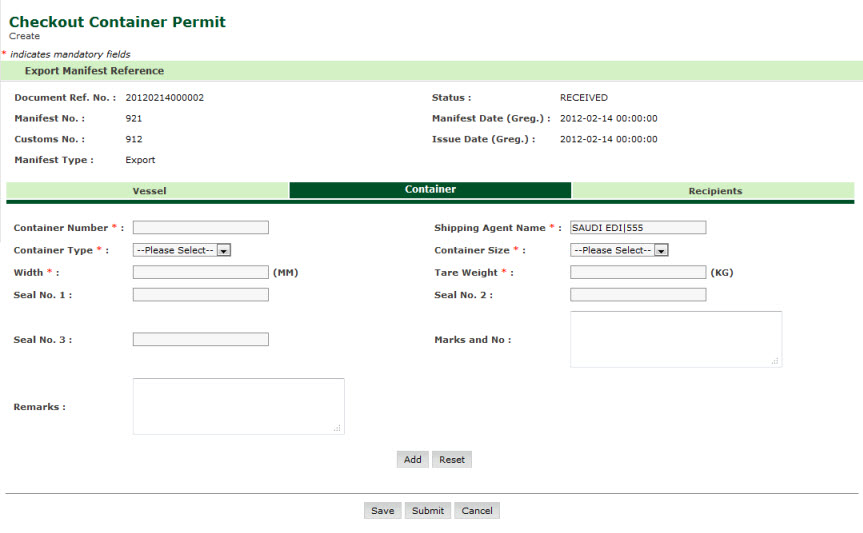
Note: Fields marked with a red asterisk * indicates that it is mandatory to input the relevant data. |
Checkout Container Permit Create Details Page
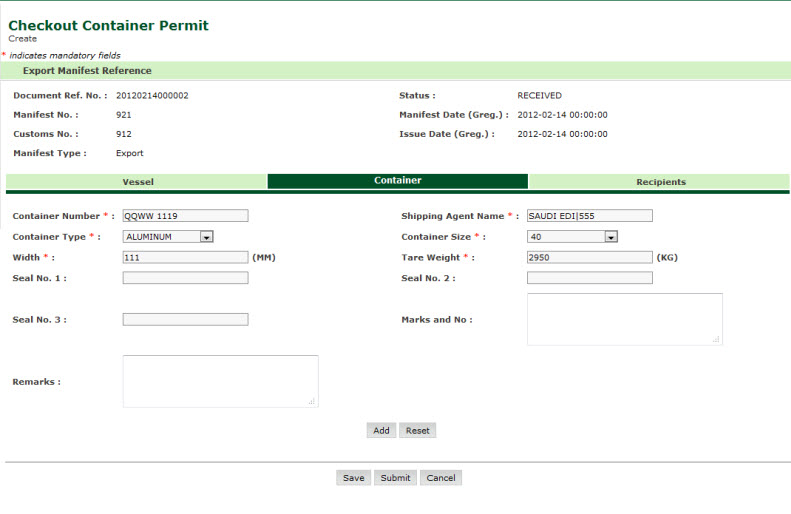
3. Enter the information in the Container Tab fields:
| Field | Description |
| Container Number | Enter the Container Number. |
| Container Type | Select the Container Type from the drop-down list. |
| Width | Enter the width of the container. |
| Shipping Agent Name | Enter the Shipping Agent name. |
| Container Size | Select the size of the container from the drop-down list. |
| Tare Weight | Enter the tare weight. |
4. Enter the field values and Click Add button, to save container details in data grid.
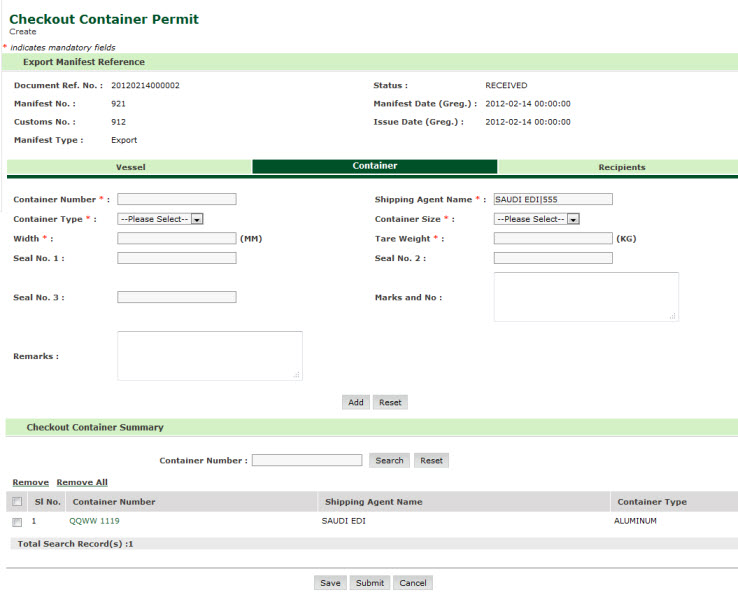
Checkout Container Permit Create Details Page
5. Click the Container Number link, to edit the container details. The following screen will be displayed.
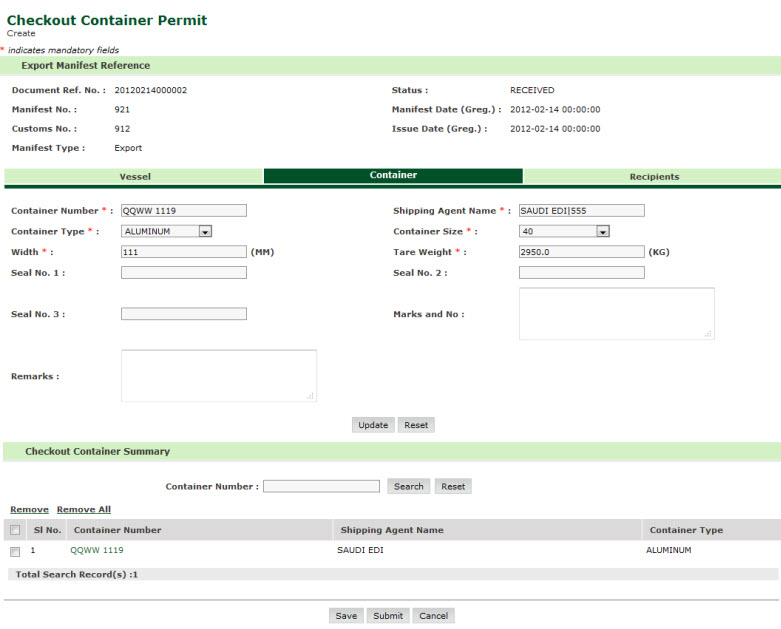
Checkout Container Permit Update Page
6. Modify the field values and click Update button. Checkout Container permit updated screen will be displayed.
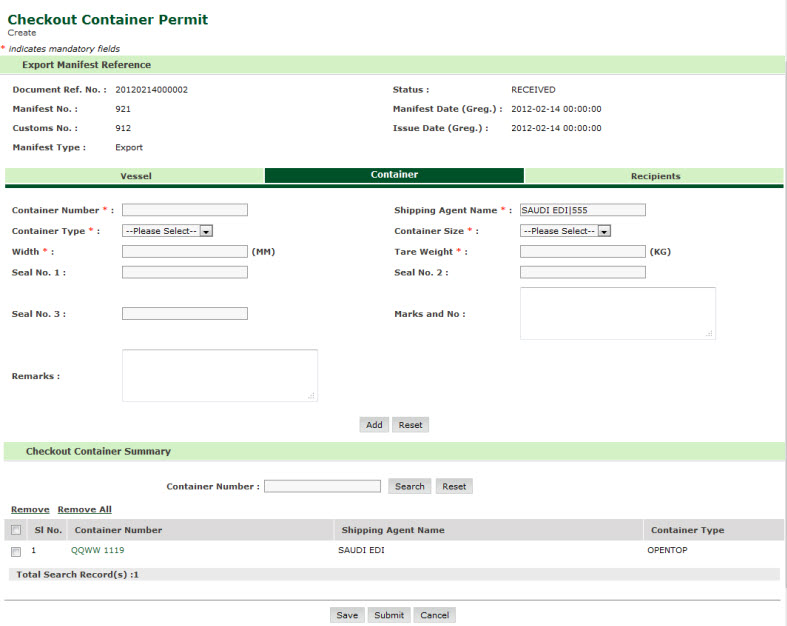
Checkout Container Permit Updated Page
Note: To delete the Container from the grid.. refer to Remove Container link. To delete all the Containers refer to Remove All Containers. |
7. Click Save button. The Confirmation Message Box will be displayed.

Confirmation Message Box
8. Click Ok button. Checkout Container Permit save success screen will be displayed with the Document Reference Number .
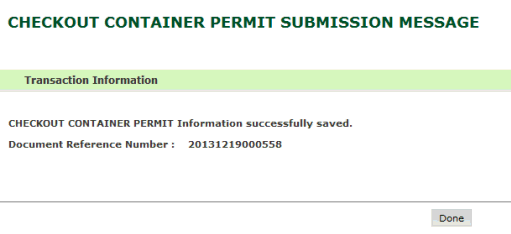
Checkout Container Permit Saved Success Page
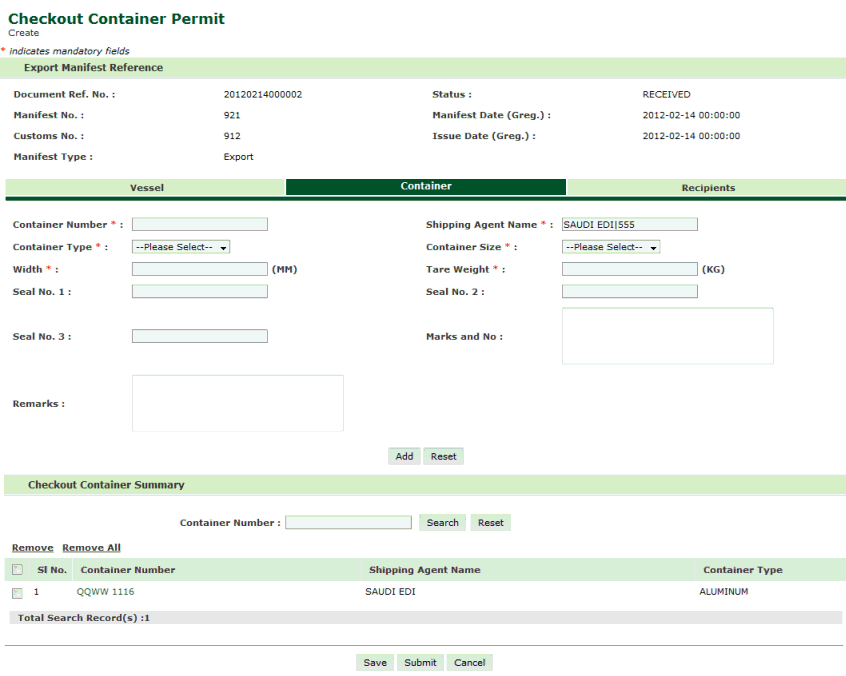
Checkout Container Permit Added Page
1. Click Submit button. The confirmation message box will be displayed.

Confirmation Message Box
2. Click Ok button. Checkout Container Permit Submitted screen will be displayed with the Document Reference Number and the Submission Message Id.
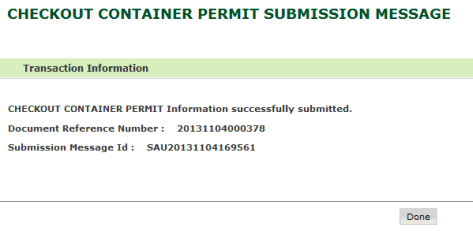
Checkout Container Permit Submitted successfully Page
Related Topics: Back to: |